





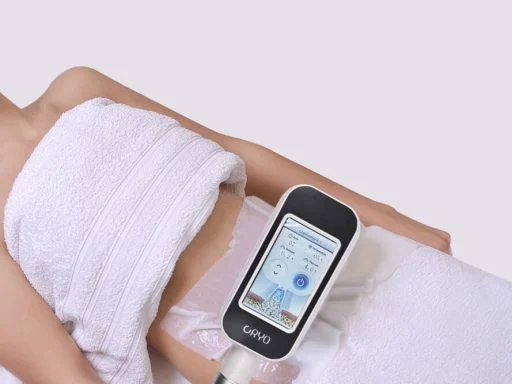
Cryolipolysis, commonly known as fat freezing, is a popular non-invasive body contouring treatment designed to reduce stubborn fat deposits without surgery. A cryolipolysis machine works by cooling targeted fat cells to a temperature that causes them to break down naturally while leaving the surrounding skin and tissues unharmed. Over the following weeks, the body gradually eliminates these damaged fat cells through its natural metabolic processes.
- Step 1: Conduct a Client Consultation
- Step 2: Assess and Mark the Treatment Area
- Step 3: Prepare the Skin
- Step 4: Position the Applicator
- Step 5: Set the Treatment Parameters
- Step 6: Monitor the Treatment
- Step 7: Remove the Applicator and Massage the Area
- Step 8: Provide Aftercare Instructions
- Final Thoughts
Whether you are a skincare professional or someone interested in understanding how the treatment works, following the correct procedure is essential for achieving safe and effective results. Here’s a step-by-step guide to using a cryolipolysis machine.
Step 1: Conduct a Client Consultation
Before starting any treatment, perform a thorough consultation. Discuss the client’s medical history, treatment goals, and expectations. Cryolipolysis is best suited for individuals with localized fat pockets who are close to their ideal weight. It is not a weight-loss solution.
Avoid treatment for clients who are pregnant, have cold-related disorders such as cryoglobulinemia, severe skin conditions, or open wounds in the treatment area.
Step 2: Assess and Mark the Treatment Area
Examine the target area and identify the fat deposits that will be treated. Common treatment areas include:
-
Abdomen
-
Love handles
-
Thighs
-
Upper arms
-
Back fat
-
Under the chin
Take measurements and photographs for before-and-after comparisons. Mark the treatment area carefully to ensure accurate applicator placement.


Step 3: Prepare the Skin
Clean the treatment area thoroughly to remove oils, lotions, and dirt. Apply the protective anti-freeze gel pad or membrane provided with the machine. This protective layer helps prevent cold-related skin injuries while allowing efficient cooling.
Never operate a cryolipolysis machine without the recommended protective membrane.
Step 4: Position the Applicator
Select the appropriate applicator based on the size and shape of the treatment area. Place it over the marked section and activate the vacuum suction. The applicator gently pulls the fatty tissue into the cooling cup for treatment.
Ensure the client feels comfortable before starting the cooling cycle.


Step 5: Set the Treatment Parameters
Adjust the machine settings according to the manufacturer’s recommendations and the client’s needs. Typical settings include:
-
Cooling temperature
-
Treatment duration (usually 30–60 minutes)
-
Vacuum intensity
Avoid using excessively low temperatures or extended treatment times that exceed manufacturer guidelines.
Step 6: Monitor the Treatment
During the session, check on the client regularly. They may initially feel pulling, pressure, intense cold, or mild tingling, but these sensations usually decrease after several minutes as the area becomes numb.
Observe the skin and ensure the machine is functioning correctly throughout the treatment.
Step 7: Remove the Applicator and Massage the Area
Once the treatment is complete, carefully remove the applicator and protective membrane. The treated area may appear firm, red, or slightly swollen.
Massage the area for several minutes. Studies suggest that post-treatment massage may enhance fat reduction by helping restore circulation and improving tissue recovery.
Step 8: Provide Aftercare Instructions
Inform clients that mild redness, bruising, numbness, or tenderness may occur for several days or weeks. Encourage them to:
-
Stay hydrated
-
Maintain a healthy diet
-
Exercise regularly
-
Avoid expecting immediate results
Visible improvements typically begin after three to four weeks, with optimal results often appearing within two to three months as the body naturally removes treated fat cells.
Final Thoughts
A cryolipolysis machine can be an effective tool for non-surgical body contouring when used properly. Success depends on careful client selection, correct machine settings, proper skin protection, and adherence to manufacturer instructions. While the procedure can reduce localized fat deposits, it should always be combined with a healthy lifestyle to maintain long-lasting results. Proper training and attention to safety protocols help ensure clients achieve the best possible outcome with minimal risk.